Wednesday, June 29, 2011

Fins and Scales

Many wonderful artists are making their fins out of products like Fantasy Film so I decided to try a different approach.
I will be using Translucent Liquid Sculpy for this so I can put the entire piece in the oven as often as I want.
It will take the heat and remain rather transparent and flexible
Squeeze out a puddle of TLS on a sheet of foil.


 Shape and thin it out with a brush or your finger. this is thicker down the middle so I have more to insert into the clay figure.
 Cure with the heat gun or in the oven.
 Peel it off the tinfoil.


 A slit is made in the lower torso (tail?) to insert the side fins. The sheet I made is cut down the center so I have two fins roughly the same size and shape.
 They are inserted into the side slits and the clay is fused back over the fins. You can see the clay is slightly translucent (see my finger tips behind the fin)
 The tail starts with a number of wires taped down to some foil. These will insert into the tubes sticking out the end of her tail. A layer of TLC is brushed over the wires and cured. The tape holds the wires down so the tail does not get too thick. Once the first part is cured, the tape comes off and the rest of the tail is done.

The tail is shaped.


To make scales, I have taken some brass sheeting and ground out two different sized semicircles with my Dremel Tool.


The brass scale tools are pressed into the raw clay to make deep scales.I am making them deep to hold more color before I cure them. The body of the tail is all large scales. the small scales are found at the base of the tail fin and along the side fins (these are shaped to match my Koi in the pond)
Next time we will look at how I colored these and finished the scales before curing.
Thanks for looking, have a great day!
Mark


Tuesday, June 28, 2011

Sailor Armature

This piece is not working well for me and I am ready to trash the whole thing. However, you can learn a lot about how to fix things from watching my mistakes so I will continue and we will see if we get anything remotely decent out of this adventure.
Since the last post, I have pretty well finished the sculpting of the mermaid. Since this is straightforward sculpting, I will not bother posting the steps but will move on to the male figure.

The first step in this is to make another wire armature and pose it to match my sketch.
I have decided to use a solid rod instead of a flat piece of bronze for the kelp support since most of you will not want to take time to learn brazing to work along. The rod in this case is 3/16" diameter and is from my local Lowe's Home Improvement Store. The rod is bent to follow the wire armature with the end turned up to accept the tube from the mermaid's hand. I have altered the position of the hand connection in my original drawing so she will be touching him on the abdomen rather than the chest.
 The rod in place and ready to secure to the armature.
 The rod is simply foil-taped onto the armature at a number of locations.
From the feet looking forward.
 A tube of 7/16" brass is cut and slides over the end of the rod. this is the connector for the mermaid's arm which will be crimped onto the mermaid and will be free to slide off the support rod.
The arm of the mermaid slides into the extension tube we just placed on the support rod and is crimped onto the arm with a pair of pliers.
 This will give you some idea of how the support system is working
 I like the fact that she is so far off the support rod at the point of contact at his elbow. It makes them look like they are floating- I hope.

Here is the next fix that I came across as I worked. She was twisting around the support rod too much so I decided she needed to have the other hand attached to him as well. I bent a small 5/16" tube at an angle and foil-tapped it to the upper arm of the male. The female arm is bent at the same angle as the left (support) arm so they can just pull up and out of the sockets for removal.
This created a different issue. The mermaid now was pushing the sailor's arm down and adding stress to his shoulder so it would have cracked later.  Onto the next change!


I fixed this issue by adding two 5/16 rods to the shoulder/ torso area. the first was run across the shoulder form elbow to elbow.


 The second rod was run from the elbow to the hip along the side of the torso. They are foil-taped in place and covered with masking tape.

As you can see, these additions allow the mermaid to hang out in space very nicely.


Next time we will look at making fins and scales.
Have a great day!
Mark

Friday, June 24, 2011

Mermaid Armature

Once we have a working design, the next step is to work out the structure needed to support the pieces. I do this on my sketch as follows:

Starting at the bottom of the piece, the kelp which will support the entire set will be made of a sheet of bronze. I chose bronze because it is easy to work with (braze, cut) since it is a copper alloy but it has more rigidity than copper and brass. I also happen to have sheets of it from my days as a bronze sculptor.
The support rod will be brazed onto the kelp at the sailor's elbow and run up the arm, through the shoulder,
 and down the torso to the point where her hand will attach to his body. The only points of contact will be as follows: Kelp base to base, kelp to elbow, and her left hand to his body. In addition to these supports, I will add a basic wire armature in his body to support the legs and arms.


 I will start with the mermaid armature since she is the easiest. The basic wire armature is made of 14 gauge wire. One long set for the torso/legs, one set for the torso/arms, and the spine/neck.
 Brass tubes are slipped over the torso/leg wires and then bent at the bellybutton and angled down to the second bend at the hip joint.
The basic measurements I use can be found at:
http://madsculptor.blogspot.com/2011/02/proportions-simple-guide.html.
 The upper torso is prepared in the same manner as the legs.
** Please notice I did not run the tube all the way down the spine. This was done yesterday after lunch. As I sculpted, I realized that this should be all the way down the spine for more support. Do it the right way and run your tube down the spine for more support!

 The neck wire, upper torso wire, and lower torso wires are all foil taped together to create the spine area.
Finished armature is ready for padding out with foil.
There is no need for tubing on her right arm since it will not be attached to the male and is not needed for support.
 The body is filled out with foil so the outer layer of clay is about 3/8" thick.
 All metal is covered with tape to keep the oxidation from getting into your clay.
The final step before adding clay.
**Here is the fix for my mistake of not extending the arm tube down the spine. If you look closely at the supporting arm you can see a second tube has been added which runs along the upper arm and follows the torso to the hip. this is foil taped on and then covered with masking tape.
Thanks for tuning in. Have a great day!


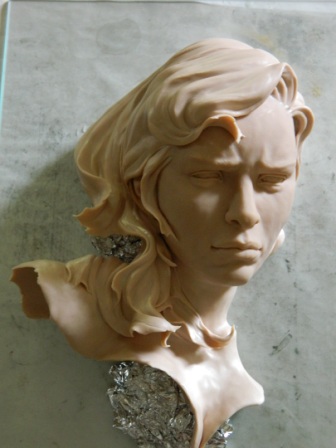
BTW, here is a preview of what we will do next.

Thursday, June 23, 2011

NEXT- Mermaid and Sailor

Here is the next one we will do. See ya soon!


Sorry, fast, bad sketch (Darn it Jim, I'm a sculptor not an illustrator!)

SUPER HEATING

I promised this to Betty Lou and I finally got around to doing it so here goes.
Polymer clay is wonderful stuff. It has a good deal of strength on its own but we can increase the strength of the final product by doing two things; cold bath and super heat.
We have touched on these two procedures before in past postings but it never hurts to do it again.
COLD BATH is simply taking the figure out of the oven while it is hot (just as the curing cycle ends) and placing it in the freezer, refrigerator, snow bank, etc. The idea is to drop the temperature as fast as you can. This will help stop cracks from the cooling process. It works, I have done over 70 pieces this way by now. I used to use a cold water bath but no longer do as it is hard to get the water out of these small figures and polymer clay grows mold very well.
SUPER HEATING adds additional flexibility and strength to the clay.
 STEP 1: Sculpt your piece. Here I have done a fast sculpt of a male hand to demonstrate. You need to pay attention to the sheen on the surface of the clay as we progress. This shiny clay is uncured at this point; notice the sheen to the surface.
Be sure all sharp ridges are smoothed down before curing. These ridges will scorch when you hit them with the heat gun.


STEP 2: Bake at the clay manufacturers recommendations. This is the same hand after curing in the oven. Baked clay will have a "flat" appearance. There is a little shine to the clay but not as much as the raw clay shows.


STEP 3; Super heat the clay. Use a standard heat gun (paint stripper) to super heat the clay. Stay about 4" away from the clay and keep the gun moving around. Focus the heat on the bulk of the hand, not the fingers. You need to alter the structure of the hand as well as the fingers or they will just snap at the base of the finger where they meet the "old"clay. Once the hand is heated you will move up the fingers to superheat them as well. This will take about 45 seconds to do a hand.
This is the super heated hand. Note the sheen to the surface. This is the end point you want to reach.
BE CAREFUL! The gun can reach temps of 1,000 degrees so it will scorch and burn if you are not careful! (see the little scorch mark on the back of the hand)


The images below show how much bend you can get when you super heat. This is done while still warm from the process. Once they cool, they will have less bend but still resist breaking .

Wednesday, June 22, 2011

WIP

Here is a little update on somethings I had had sitting around for too long.
Finished the Raven by adding a set of glass beads on wire (so they can be posed) and some feathers to the temples.

 New piece in progress awaiting the base and lantern.
Just finished this one. I think she is ready to cure. This one is 12" from top to bottom. May make a mold and cast her if she grows on me.
Have a great day!